Scroll to the bottom to find links to all the supplies you need as well as a quick video to compliment the step-by-step picture tutorial.

Bottle Cap Images (Buy Digitals & print/cut your own OR buy precut)
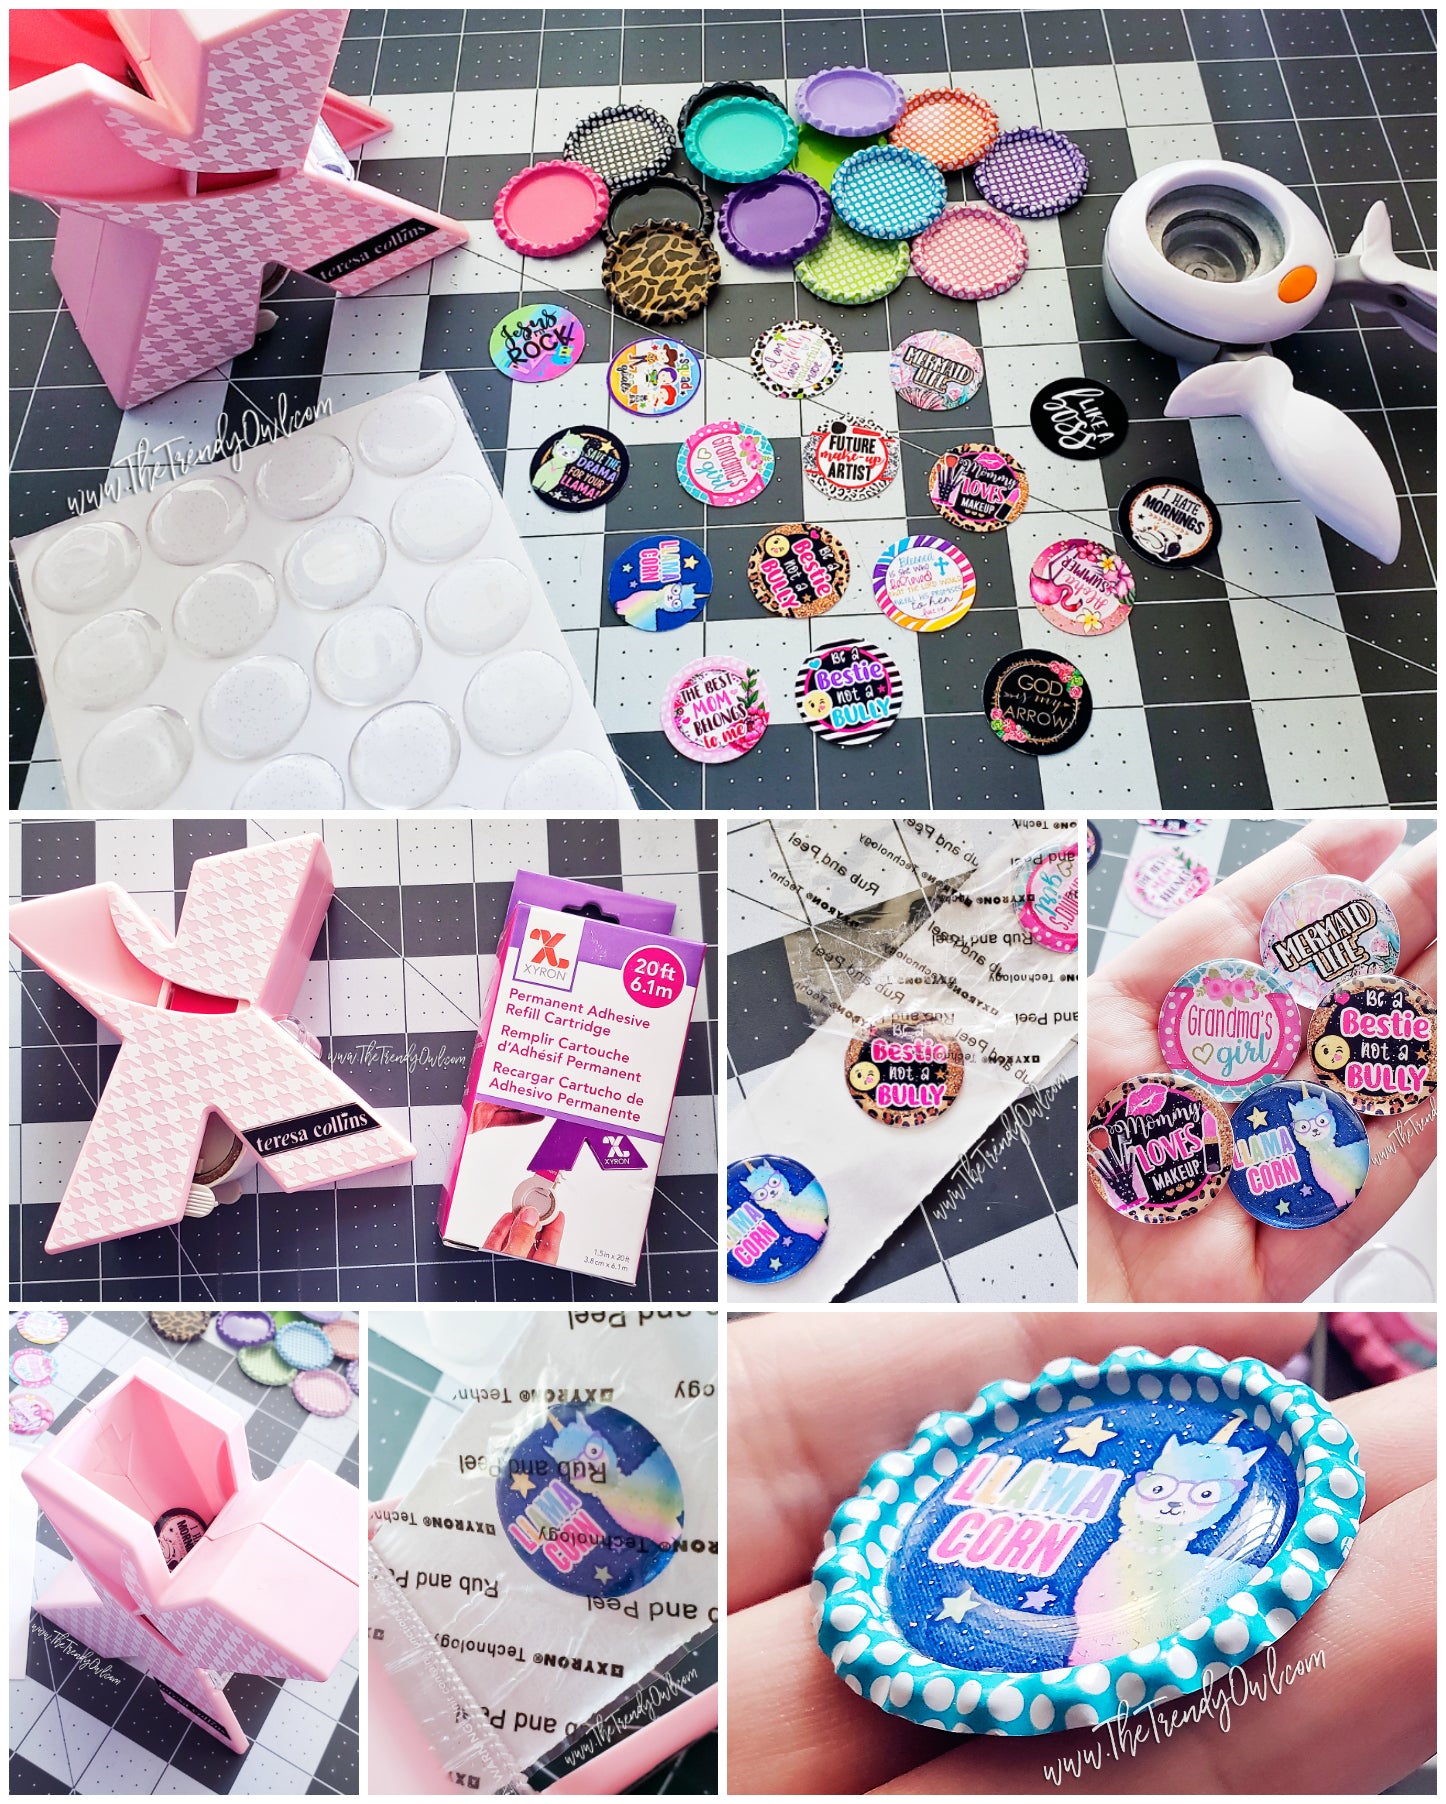
1" Adhesive Epoxy Dots
Xyron Sticker Maker (w/ permanent adhesive roll)
Flat Cap Blanks

Let's get started!!

STEP ONE: Punch out all of the images you would like to use. Now is a great time to pick bottle caps that will match because at this point there isn't anything sticky on the back of the images so you can set them in and take them out as many times as you want without any problems!

STEP TWO: Attach an epoxy sticker to each precut image. I find it easiest to do it while holding the image in one hand and the sticker in the other. It's very important to get the epoxy perfectly lined up so that it protects & covers the entire image so take your time with this step!
 STEP THREE: Place the image into the sticker maker face up where you see the arrow. Find where the paper exits and carefully pull while you feed the image through. Once you see the image on the other side you are clear to insert another.


You can do as many as you would like! I love to do them all at once. When you're finished, pull the paper through until you see that your last image is cleared. At this point you can tear the paper off from the roll.

STEP FOUR: Rub the top plastic layer to make sure that the adhesive peels up nicely then carefully lift off the plastic film. Once you do this, your images will be ready to place into the flat caps! They are not sticky on the bottom so be sure to not place them anywhere until you are ready for them to stay there.

As an extra precaution I like to line out my caps next to the images to make sure I still like the selections I decided on. 
STEP FIVE: Press your images into the center of your caps. If you are nervous about getting them perfectly into the center you can lightly set them in at first and then when pressing them in you may be able to shift them around a smidge.

Once you press them in, they are not going ANYWHERE! They are secure & ready to use!
You're Done!!
Now wasn't that easy?! Not only does the finished product look professional grade but it will hold up amazingly well in all kinds of circumstances. I love this method so much that I will never go back to using glue that oozes out the sides if you use just a teensy bit too much. Glue that completely stinks up the work area. Glue that, if you use the wrong type of paper, will break down and ruin the pictures you are using in a matter of hours. 
Lydia Funsch
Marisol, yes. You want to purchase the 1.5" kind that way it is big enough for the image.
Marisol
Is there a certain size to use on the xyron sticker maker?